The complete guide
Drone Buying Guide: How to Choose the Right Drone
Buying your first drone can be confusing. Camera quality, battery life, obstacle avoidance, weight, regulations and price all play a part, and they interact in ways the specification sheets do not explain. This guide sets out everything you need to know so you can choose with confidence.
Updated July 2026
Fifteen sections
No paid placements, no sponsored positions
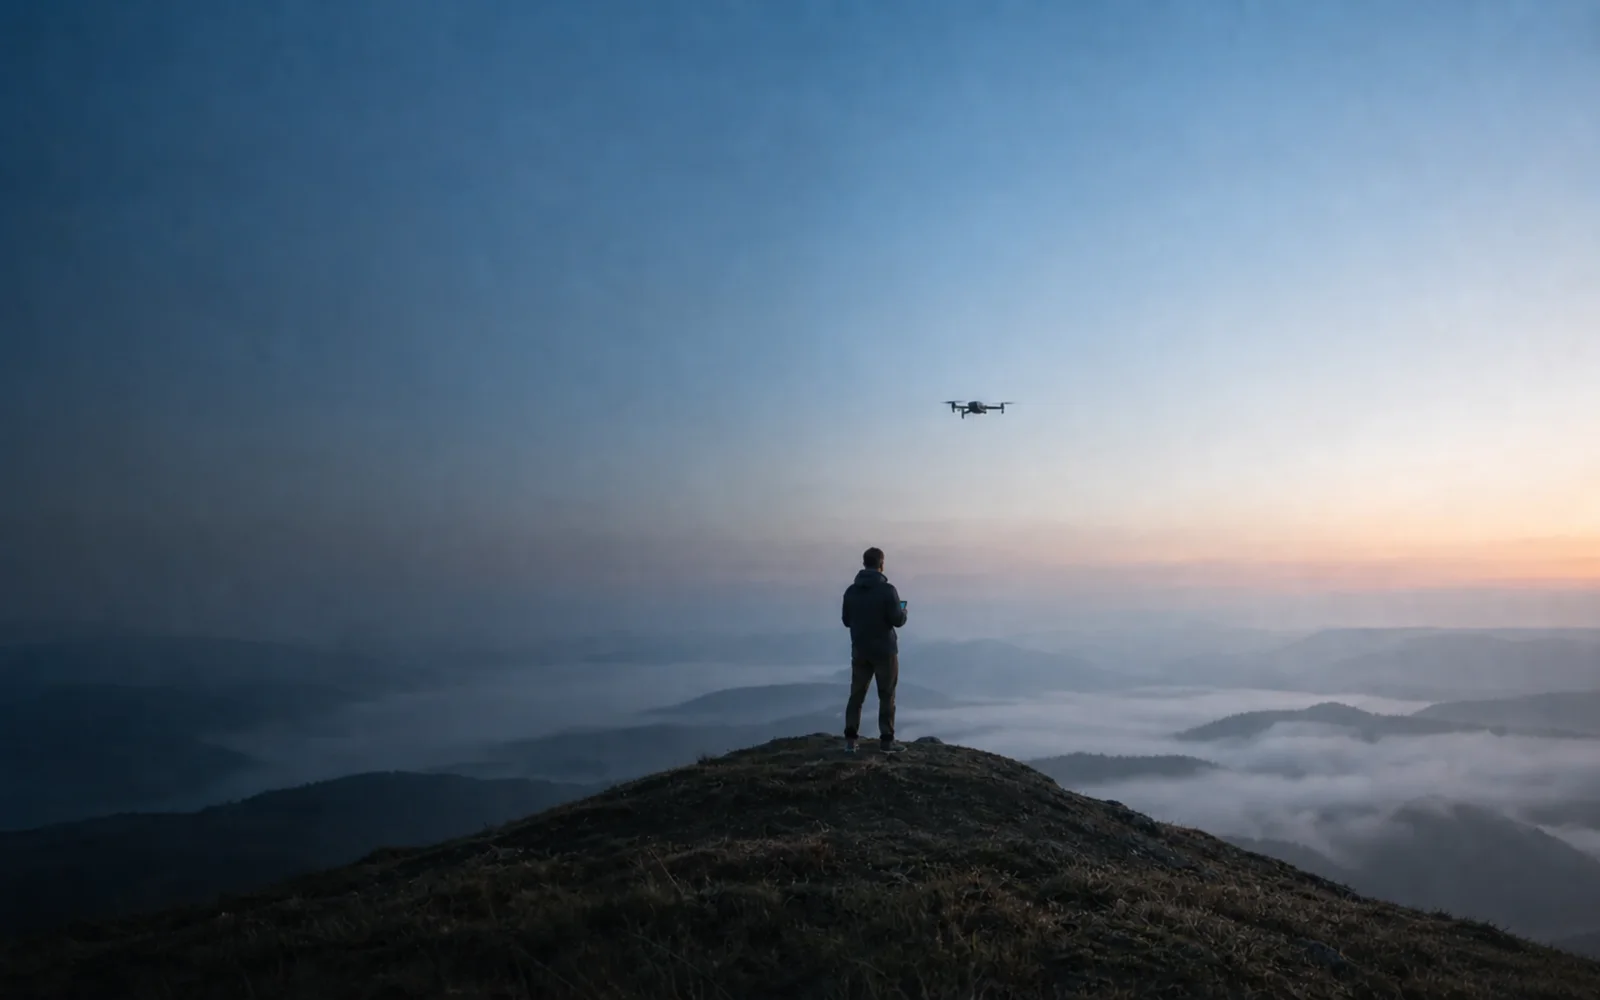
A sub-250g drone at dawn above a cloud inversion. Illustrative image, not a Creator Gear test flight.
Most drone advice starts with a shortlist. This guide does the opposite, because the aircraft is the last decision rather than the first. What you can legally fly where you live, how often you will realistically go out, and what you want the footage for all narrow the field long before any specification does.
Read it in order if you are starting from nothing. If you already know what you want, the contents below will take you to the section you need. Every figure quoted is either a manufacturer’s published specification or a published rule from the Civil Aviation Authority, and it is labelled as such.
How to use this guide
Fifteen sections, written to be read in order or dipped into. If you have half an hour, read weight classes, camera quality and UK regulations. Those three decide most purchases.
Quick navigation
What this guide covers
What will you use your drone for?
The most useful question you can answer before reading a single specification. Six honest profiles, and what each one should be prepared to spend money on.
Travel
You want something that disappears into hand luggage and does not add a paperwork problem at every border. Size and weight matter more than image quality, because the drone you left at the hotel takes no photographs at all.
What to prioritise
- Folding design and a case that fits a daypack
- Sub-250 g if possible, for the widest access
- Spare batteries you can carry in the cabin
- A controller that pairs quickly with your phone
Photography
Stills are unforgiving in a way video is not. A single frame is examined closely, so sensor size, dynamic range and the ability to shoot RAW matter far more here than in any other use.
What to prioritise
- The largest sensor your budget allows
- RAW capture, not just JPEG
- Bracketing and HDR
- Obstacle sensing, so you can concentrate on the frame
Video
Motion hides detail but exposes instability. What separates usable footage from unusable is almost always the gimbal and the frame rate, not the resolution number on the box.
What to prioritise
- A three-axis mechanical gimbal, without exception
- 4K at 60 fps for flexibility in the edit
- A flat or log colour profile if you grade
- Reliable subject tracking
Social media
The job is a good clip in a short time, often alone, often once. Automated shots and vertical framing do more for this than any specification.
What to prioritise
- One-tap automated shots
- Vertical or portrait capture
- Fast transfer to a phone
- Something small enough that you take it out
FPV flying
This is a hobby in its own right rather than a camera that flies. The reward is the sensation of flight, the cost is a real learning curve and a much higher chance of crashing.
What to prioritise
- Goggles and a motion or stick controller
- A simulator before the first flight
- Spare propellers and a repair kit
- A model that is cheap to break early on
Family and fun
The aim is that everyone gets a turn and nothing ends in tears. Guarded propellers and forgiving handling are worth more here than any camera specification.
What to prioritise
- Propeller guards, ideally built in
- Satellite positioning so it holds still
- Low purchase cost and cheap spares
- Short setup, so it flies within minutes
Photo spaceA flat lay showing the range of use cases: a folded travel drone, a controller, a phone showing a tracking shot, and a pair of FPV goggles.
The four kinds of drone
Only two of these are a sensible first purchase. The other two are here so you can recognise them and move on.
Camera drones
The mainstream category and the right starting point for almost everyone. A stabilised camera on a gimbal, satellite positioning, automated return to home, and a controller with sticks. They hover on their own, which is what makes them learnable.
What to prioritise
- Best all-round choice for stills and video
- Easiest to learn on
- Widest choice at every budget
FPV drones
Flown through goggles from the aircraft’s point of view. Fast, immersive and completely manual in their purest form. Some models now offer stabilised modes that make them approachable, but the discipline is different from flying a camera drone.
What to prioritise
- Bought for the flying, not the footage
- Steeper learning curve and more crashes
- Practise in a simulator first
Self-flying cameras
Small, enclosed aircraft that launch from your hand and fly a preset move without a controller. Closer to an action camera that hovers than to a drone. Excellent at following you, limited in range and creative control.
What to prioritise
- No real learning curve
- Safer around people, enclosed propellers
- Short flight times and short range
Enterprise drones
Built for survey, inspection, mapping, search and thermal work. Heavier, far more expensive, and they sit outside the Open Category rules that cover recreational flying. Listed here so you can recognise and rule them out.
What to prioritise
- Payloads such as thermal and zoom cameras
- Different regulatory requirements
- Not a consumer purchase
Drone weight, and why it decides everything else
If you read one section of this guide, read this one. In the UK the weight of the aircraft, together with its class marking, decides where you may legally fly and how close you may go to people who are not part of your flight. It constrains the purchase more than any camera specification, and it is the constraint most first-time buyers discover after they have already bought.
Photo spaceThree drones of different sizes side by side on a plain surface with a hand or coin for scale, showing the jump from sub-250 g to a larger aircraft.
Under 250 grams
The most popular class, and with good reason. Below 250 g an aircraft falls into the lightest bracket of the Open Category, which carries the fewest restrictions on flying near uninvolved people. In a country as densely built as the UK, that is often the difference between being able to fly where you are standing and having to drive somewhere else.
What changed in 2026 is that the weight no longer exempts you from registering. A Flyer ID is required from 100 g, and an Operator ID from 100 g for anything carrying a camera. Every camera drone in this class needs both.
The physical cost is real. Keeping an aircraft under 250 g means a smaller battery, a smaller sensor and less mass to resist wind. Sub-250 g drones are the ones you actually carry with you, and the ones you leave in the bag when it is gusty.
250 to 500 grams
An awkward middle. You gain sensor size, battery capacity and stability, and you give up the proximity latitude of the lightest class. Aircraft here fly in the A2 or A3 subcategory depending on their class marking, and A2 requires a Certificate of Competency that A1 does not.
Worth watching: some aircraft sold as sub-250 g cross this line the moment you fit the larger battery or the propeller guards. The figure that counts is takeoff weight, meaning the aircraft exactly as it flies.
Over 500 grams
Larger sensors, longer endurance and far better behaviour in wind. Also the strictest siting requirements: without the right class marking you are flying in A3, which means staying at least 150 m horizontally from residential, recreational, commercial and industrial areas. In practice that rules out most of the places people live.
If you want this class, the purchase decision starts with where you can realistically get to, not with the camera.
|
Weight class
|
Where it usually sits
|
What it allows
|
The trade-off
|
|---|---|---|---|
|
Under 250 g
|
A1, the lightest bracket
|
Most latitude near uninvolved people
|
Small sensor, short endurance, weakest in wind
|
|
250 to 500 g
|
A2 or A3, by class mark
|
Better camera and more stability
|
A2 needs a Certificate of Competency
|
|
Over 500 g
|
A3 in most cases
|
Best image quality and wind handling
|
150 m from built-up areas
|
Subcategory placement depends on the aircraft’s class marking as well as its weight. The CAA sets these rules and is the only source that is guaranteed current.
Where the weight is measured
Takeoff weight is the aircraft as it flies: battery, propellers, memory card, guards and filters included. Fitting a larger battery or a set of guards can move a drone out of the class you bought it for, and the rules follow the weight rather than the box it came in.
Camera quality, in order of what actually matters
Camera specifications are where drone marketing does its heaviest lifting, and where the number printed largest is rarely the number that matters. Taken in order of how much difference each one makes to the picture:
1. Sensor size
Drone sensor areas drawn to scale. Sensor size is the first thing that decides image quality, and the gap between classes is larger than the spec sheet suggests.
First, and by a distance. The sensor is the surface that collects light, and its physical area sets how much light it can gather. Larger sensors produce cleaner images in poor light and hold more detail in the bright and dark parts of the same frame.
The formats you will meet, smallest first. A 1/2.3-inch sensor measures roughly 6.2 by 4.6 mm, about 28 square millimetres of area, and is standard on entry-level drones. A 1/1.3-inch sensor sits above it and is the format that lifted DJI’s Mini 4 Pro and Flip above their own entry models. A 1-inch type has roughly four times the area of a 1/2.3-inch sensor. Four Thirds, at about 17.3 by 13 mm, has roughly eight times the area and appears on professional aircraft.
The practical consequence: a 12 MP photograph from a 1-inch sensor will beat a 48 MP photograph from a 1/2.3-inch sensor in almost every situation that matters. Megapixels describe how finely the image is divided, not how much light was available to make it.
DJI publishes no millimetre dimensions for any of these sensors, only the inch-type label, so the rectangles are drawn from the published dimensions of sensors in the same class. The inch-type name refers to the outside diameter of an obsolete video camera tube rather than to any part of the sensor itself, which is why a 1 inch type sensor measures about 16 mm across the diagonal.
2. The gimbal
A gimbal is the motorised mount that holds the camera steady while the aircraft moves around it. Three axes, handling tilt, roll and pan, is the standard worth having. Fewer axes means software has to make up the difference by cropping into the frame and warping it, and it looks like it.
This is the specification that most reliably separates footage that looks professional from footage that does not, and it is the first thing cheap drones leave out.
3. Resolution and frame rate
1080p is 1920 by 1080 and is now a fallback rather than a target. 2.7K sits between 1080p and 4K and exists largely to give cheaper sensors a resolution they can genuinely feed. 4K is 3840 by 2160 and is the sensible baseline. 5.1K and above give you room to crop and reframe in the edit while still delivering in 4K. 8K, at 7680 by 4320, is a specification in search of a use on a consumer drone.
The more useful question is the frame rate at which a resolution runs. 4K at 30 fps is enough for most work. 4K at 60 fps lets you slow footage to half speed and still deliver 4K. 4K at 100 or 120 fps gives proper slow motion. A drone capped at 4K and 30 fps cannot give you slow motion at full resolution, whatever else it offers.
4. Aperture
The f-number describes how wide the lens opens. f/1.7 admits considerably more light than f/2.8, which is why two drones quoting a similar sensor size can behave very differently at dusk. Most drone apertures are fixed, so this is a permanent property of the aircraft rather than something you adjust in the moment. A few premium models offer a variable aperture, which is genuinely useful because it lets you control exposure without reaching for a filter.
5. RAW, HDR and colour
RAW capture saves the sensor data before the camera makes decisions about it, which leaves far more room to recover a blown sky or lift a dark foreground. If you edit your photographs at all, insist on it.
HDR blends several exposures to hold detail at both ends of the range. That is useful in exactly the situation a drone is always in, which is pointing at a bright sky and a dark landscape at the same time.
Colour depth and profiles matter only if you grade your footage. 10-bit capture and a flat or log profile give you a file that survives heavy correction. An 8-bit standard profile falls apart much sooner. If you upload straight out of the app, you can ignore this entirely and lose nothing.
A note on low light
Drones are poor low-light cameras and always will be, because the sensors are small and the aircraft is moving. Expect visible noise after sunset regardless of what you spend. The hour after sunrise and the hour before sunset give you the most flattering light and usually the calmest air, which is a better answer than any specification.
Flight time: the claim and the reality
Every flight time you will read is the manufacturer’s own figure, and every one of them is measured in conditions you will not fly in: no wind, a steady hover or a gentle forward cruise, flown until the battery is effectively empty.
Climbing is expensive. Hovering while you compose a shot is expensive. Fighting wind is very expensive. And no sensible pilot lands on an empty battery, so a reserve comes off the top before you start. Plan for meaningfully less than the quoted figure and treat the difference as the cost of flying safely rather than as a manufacturer exaggerating.
Around 18 minutes quoted
A short session. Fine for automated shots close by, frustrating if you want to fly somewhere and explore.
Around 25 minutes quoted
Enough to fly out, compose, shoot and return without hurrying. The point at which flying stops feeling rushed.
30 minutes and above quoted
Flight time stops being the thing that limits you, and your card or your patience runs out first.
Any figure, in wind
Expect a noticeable reduction. The aircraft is working constantly to hold position, and that comes out of the same battery.
On Fly More style bundles
Bundles that add two spare batteries, a charging hub and usually a bag almost always cost less than buying those items separately, and the batteries are the part that changes your experience most. If you are confident about the aircraft, buy the bundle. If you are not yet sure you will enjoy flying, buy the aircraft alone: the bundle is an expensive way to find out.
Range and transmission
Transmission range figures are the least useful numbers on a drone specification sheet, because the limit on how far you may fly is not distance but sight. UK rules require you to keep the aircraft where you can see it with your own eyes. A small drone becomes genuinely hard to see well before one kilometre, so a quoted range of eight or ten kilometres describes the radio link rather than any flight you are permitted to make.
Those figures are also quoted in ideal conditions: clear line of sight, no interference, nothing in the way. Buildings, trees, other radio traffic and your own body between the controller and the aircraft all reduce them, sometimes dramatically.
Where the number does matter is reliability rather than reach. A stronger transmission system holds a clean, low-latency video feed at the distances you will actually fly, and degrades gracefully instead of dropping out. That is worth paying for. The last five kilometres of a quoted figure are not.
Safety features, and what each one does not do
Ranked by how much they protect a new pilot, rather than by how prominently they appear in the marketing.
01
Satellite positioning
GPS and, on better aircraft, several other constellations working together. This is what lets a drone hold its position when you take your hands off the sticks. Without it the aircraft drifts with the wind and has to be flown constantly. It is the most important item on this list and the first thing very cheap drones leave out.
02
Return to home
The aircraft climbs to a set height, flies back to its recorded takeoff point and lands. It can be triggered by you, by a low battery or by a lost signal. Set the return height before your first flight: the default may be lower than the trees between you and the drone.
03
Obstacle sensing
Sensors that see obstacles and stop or steer around them. Coverage varies: downward only on entry models, forward and downward in the middle of the market, omnidirectional at the top. It does not reliably see thin branches, cables, netting or glass, and it does nothing at all about flying somewhere you should not have.
04
Downward vision sensors
Cameras that look at the ground so the aircraft can hold position precisely at low altitude and land accurately, including indoors where satellites do not reach. They need a surface with texture to read, which is one reason a landing pad helps.
05
Hover accuracy
How tightly the aircraft holds a fixed point, quoted as a small measurement in metres, vertically and horizontally, with and without satellite lock. A drone that drifts half a metre while you compose is tiring to use. One that sits still is not.
06
Low battery and forced landing behaviour
What the aircraft does when the battery becomes critically low or it cannot get home. Read this in the manual before you need it. Knowing the behaviour in advance is the difference between a controlled descent and a search.
None of it replaces line of sight
Every feature on this list assumes you can see the aircraft and know which way it is facing. The most common beginner accident is not a collision the sensors missed. It is losing orientation and flying confidently in the wrong direction. Keep the drone close and keep it in sight until that is second nature.
Intelligent flight modes
Automated moves that turn a first afternoon into usable footage. Names differ between manufacturers; the ideas do not.
ActiveTrack
The aircraft locks onto a subject you draw a box around and keeps it framed while it moves. The most genuinely useful automated feature, and the one where implementations differ most between manufacturers.
Follow Me
The drone follows the controller or your phone rather than a visually tracked subject. Simpler than ActiveTrack and less prone to losing you, but it follows a signal rather than a shape, so framing is cruder.
Orbit
A circle flown around a fixed point with the camera held on it. Reliably good-looking, easy to set up, and the single best shot available to someone on their first afternoon.
QuickShots
One-tap preset moves such as a rising reveal, a spiral or a fly-away. Designed to produce a finished clip with no piloting skill at all. Genuinely handy, and easy to overuse.
MasterShots
A sequence of preset moves flown in one go and stitched into a short edit automatically. Convenient, but you have less control over what ends up in the cut.
Waypoint flying
You mark a route on a map and the aircraft flies it. Valuable when you want the same shot on different days, or an identical path for a time-lapse. Not offered on every model.
Hyperlapse
A time-lapse flown along a path, so the scene compresses in time while the camera moves through it. Battery-hungry and slow to shoot, but very effective.
Cruise control
Holds the aircraft on a heading and speed so you can let go of the sticks and concentrate on the camera. Unglamorous, and the mode experienced pilots miss most when it is absent.
Controller types
How you fly the aircraft matters more to the experience than most buyers expect, and it is often the cheapest thing to upgrade.
Standard controller with your phone
Physical sticks with your own phone clipped on as the screen. The common bundle, the cheapest, and perfectly good. The compromises are that your phone battery drains, notifications interrupt you, and setup takes a minute longer.
Controller with a built-in screen
A brighter dedicated display, no phone in the loop, and a faster start. Usually a paid upgrade. Worth it if you fly often or in bright sunlight, where phone screens struggle.
Phone only, over Wi-Fi
No controller at all. Convenient and pocketable, but range is short, latency is higher and there are no sticks, so precise flying is difficult. Fine for automated shots close by, poor for learning to fly properly.
Beacon or wearable
A small handheld unit used by self-flying cameras to start a shot and to be followed. Almost no learning curve, and almost no manual control.
Goggles and a motion controller
The FPV route. One hand, a tilt-and-trigger grip, and a first-person view. Immersive and fun. Note that flying through goggles means the aircraft is not in your direct sight, so a competent observer is required.
Batteries
Drone batteries are lithium polymer packs and they behave differently from the battery in your phone. Three things are worth knowing before you buy.
Charging
Most manufacturers sell a hub that charges several packs in sequence from one power source. If you own more than two batteries it is close to essential, because charging them one at a time takes an afternoon. Some hubs offer a faster charge mode, which is convenient and does shorten the working life of a pack slightly.
Storage
Lithium packs do not like being left at full charge. Manufacturers build in a self-discharge that brings a pack down to a storage level after a set idle period, which is intended behaviour rather than a fault. Follow the manual for your aircraft on how long a pack may be left and at what charge, rather than a rule of thumb from a forum.
Photo spaceA charging hub with three batteries seated in it, plus one spare pack on the surface beside it.
Health and travel
Batteries are consumable and their capacity falls with use. The app usually reports cycle count and health. A swollen pack is scrap, not a repair, and should be disposed of properly rather than flown. For travel, lithium batteries must go in hand luggage and never in the hold, and airlines limit how many you may carry and at what state of charge. Check the airline before you pack.
How many to buy
Three batteries is the number that changes the experience. One battery is a demonstration. Three is practice, and practice is the only thing that reliably makes you a better pilot.
Wind resistance
Wind resistance is quoted as a maximum speed in metres per second, and beginners skip past it because it reads like a footnote. It is not.
Two things make it matter. The wind at 100 metres is stronger than the wind you feel standing on the ground, sometimes considerably, and there is no way to judge it from where you are standing. And a drone fighting wind is working constantly, so a breezy day can take a large bite out of your usable flight time even when the aircraft copes perfectly well.
A quoted figure of around 10.7 metres per second is common on the popular sub-250 g models, and around 8 metres per second on the very lightest. Those numbers describe the wind in which the aircraft can still hold position. They do not describe the wind in which it flies well, or in which you will enjoy flying it.
A usable rule
For a first year of flying: if the forecast is above roughly half the quoted maximum, wait for another day. No shot is worth the walk home without the drone.
Accessories: what to buy and what can wait
In the order they earn their place. The first two are not optional.
Photo spaceAccessories flat lay: memory cards, two spare batteries, a folding landing pad, an ND filter set, spare propellers and a case.
01
Memory cards
The one accessory nobody should skip. 4K video needs sustained write speed, not just capacity, so look for a V30 or U3 rating: both guarantee a minimum sustained write of 30 MB per second. Buy from a retailer you trust, because counterfeit cards are common and fail exactly when you are filming.
02
Spare batteries
The highest-value purchase after the aircraft. Two spares turn a short outing into real practice, and practice is what makes you a better pilot. Fly More style bundles usually work out cheaper than buying batteries individually.
03
A landing pad
A folding disc that keeps grit, sand and wet grass out of the motors and gives the downward sensors a clear surface to read. Cheap, light, and it noticeably reduces wear.
04
ND filters
Neutral density filters cut the light reaching a fixed-aperture camera so you can use a slower shutter speed. That is what gives video natural motion blur instead of a stuttery, over-sharp look. The single most effective upgrade to video quality that is not the aircraft itself.
05
Spare propellers
Consumable. They chip, they warp, and a damaged propeller causes vibration that the gimbal cannot fully correct. Keep a spare set in the bag and change them without sentiment.
06
A case
Most aircraft ship in something adequate. A hard case matters if the drone travels in checked luggage or lives in a car boot. Batteries should still come into the cabin with you.
07
A car charger or power bank
Only worth it if you fly away from mains power. Charging in the car between locations is the difference between one flying session per day and three.
Five checks before you spend anything
All five are free, all five take minutes, and any one of them can change which drone you should buy.
01
Map the airspace where you would actually fly
Not where you imagine flying, but the places you can reach on a normal weekday. Airports, military sites, prisons and some public buildings sit inside restricted zones, and an airspace app will show you in seconds. If everywhere within reach is restricted, that is worth knowing before the money leaves your account.
02
Read the current CAA requirements
Registration changed on 1 January 2026 and the class marking system is still in transition. Read the rules as they stand today rather than an article from two years ago, and get the Flyer ID test out of the way. It is free and it takes an evening.
03
Check landowner permission, not just airspace
Airspace and land are separate questions. Clear airspace does not give you the right to take off from somewhere. Many parks, National Trust sites and beaches have their own byelaws about launching and landing, and they are enforced by people rather than by aviation law.
04
Be honest about weather and frequency
A drone flown twice a year does not justify a large sensor. A drone flown most weekends justifies spending more on wind handling and battery life than on megapixels. Answer this before you read another specification sheet.
05
Budget the whole kit, not the aircraft
Cards, spare batteries, a case and filters are not optional extras, they are part of the purchase. Set the total you are willing to spend, then work backwards to the aircraft. It usually means buying one model down and flying far more.
Your first flight, in the right order
The sequence below is deliberately unexciting. Followed once, it becomes habit, and the habit is what keeps the aircraft in one piece.
Photo spaceA pilot standing in an open field with the drone on a landing pad in the foreground, controller in hand, before takeoff.
01
Update everything at home
Firmware for the aircraft, the battery and the controller, plus the app itself. Do it on your own wi-fi with time to spare, never in a field with one bar of signal and a booked golden hour.
02
Check the airspace again on the day
Restrictions change, and temporary ones appear for events. Thirty seconds in an airspace app before you leave the house saves a wasted journey.
03
Choose forgiving conditions
Light wind, good light, plenty of open space and no people nearby. Your first flight should be boring. Boring is the goal.
04
Set and understand return to home
Set the return height above anything between you and where you will fly. Know how to trigger it manually and know what the aircraft will do if the signal drops. Learn this on the ground.
05
Fly the first battery without filming
No camera, no shot list. Take off, hover, turn the aircraft to face you and practise flying it towards you, which is the orientation that catches everyone out. Land. Repeat.
06
Keep it in sight
Not on the screen. In your own eyes. The moment you cannot pick it out against the sky, bring it back and reset your sense of distance.
07
Land with margin
Start the return well before the app tells you to. Landing with a quarter of the battery left costs you a few minutes and buys you the ability to go around if the landing site is occupied.
08
Log what you learned
One line after each session: conditions, what worked, what surprised you. After ten flights you will have a far more useful picture of your own limits than any review can give you.
On this page
Ready to shortlist?
Six aircraft that meet the bar set out in this guide, compared side by side with manufacturer figures and honest trade-offs.
UK drone regulations, in brief
Separation distances in the Open category, drawn to scale from UAS.OPEN.020, .030 and .040 and the Drone and Model Aircraft Code (CAP2320, March 2026). Distances are from uninvolved people. Creator Gear is not the CAA: check the current rules before you fly.
An orientation, not legal guidance. The rules changed on 1 January 2026 and the Civil Aviation Authority is the only authority on them. Check the CAA before your first flight rather than relying on any summary, including this one.
Flyer ID
Required to fly any drone of 100 g or more. You get one by passing the CAA’s online theory test, which is free to take and valid for five years. There is no minimum age to sit it, though children under 13 need a parent or guardian to register on their behalf.
Operator ID
Required for any drone with a camera weighing 100 g or more, and for any drone of 250 g or more whether it has a camera or not. It identifies the person responsible for the aircraft, is renewed annually, carries a charge, and must be labelled on the drone itself.
The Open Category
Almost all recreational flying happens here, split three ways. A1 covers the lightest aircraft, UK0 and UK1, and permits flight over uninvolved people though never over crowds. A2 covers UK2 aircraft, requires an A2 Certificate of Competency, and sets a 30 m separation from uninvolved people, or 5 m in the aircraft’s built-in low-speed mode. A3 covers heavier and unmarked aircraft and requires 150 m from built-up areas.
Height limit
The legal limit is 120 m, which is 400 feet. The CAA notes that staying below it reduces the risk of meeting other aircraft. The limit is measured from the surface below the drone, which matters more than people expect when flying along a hillside.
Distance from people and places
The Drone Code sets a minimum horizontal distance of 50 m between your aircraft and people, and at least 150 m from residential, recreational, commercial and industrial areas. Lighter class-marked aircraft flying in A1 have more latitude, which is exactly why weight class is the first decision in a drone purchase.
Restricted airspace
Airports, military sites, prisons and some public buildings sit inside zones you must not enter without permission. Check the NATS airspace map or an approved drone app before you set off rather than when you arrive.
Privacy and land
Airspace and land are separate questions, and clear airspace gives you no right to take off from somewhere. Many parks, National Trust sites and beaches have byelaws about launching and landing. People also have a reasonable expectation of privacy at home, so do not hover over gardens and delete footage you did not intend to capture.
Insurance
The CAA states that third party insurance is required if you fly for any commercial reason, and that it is optional if you fly purely for recreation, sport or as a hobby. Optional does not mean unnecessary: you remain liable for injury or damage either way.
Where to check
Flight Restriction Zone geometry from the CAA’s aerodromes guidance: an aerodrome traffic zone of 2 or 2.5 nautical miles, plus a 1 km wide protection zone extending 5 km beyond each runway end, to 2,000 ft above ground level.
The Civil Aviation Authority publishes the Drone and Model Aircraft Code and runs the registration service: caa.co.uk/drones. We link to it rather than reproducing it, because the CAA’s version is the only one guaranteed to be current. A fuller Creator Gear guide to UK drone regulations is in preparation.
Choosing a drone by budget
Bands rather than prices, because drone pricing moves constantly and discounts are deep and frequent. What matters is where the jumps in capability sit, and they are not evenly spaced.
Entry level
Around £100 to £300
Enough for a real camera drone rather than a toy, provided you buy carefully. At this level you get satellite positioning, return to home and, on the better models, a mechanical gimbal. What you give up is sensor size, obstacle sensing in most directions, and low-light performance.
- Satellite positioning and return to home
- Sub-250 g, so the widest access
- Usually 4K at 30 fps, rarely more
- Downward sensing only, in most cases
Mid range
Around £300 to £600
The band where the meaningful jumps happen. Larger sensors, brighter apertures, higher frame rates and forward obstacle sensing arrive here, along with better transmission and longer flight times. For most people who intend to keep flying, this is where the money is best spent.
- Larger sensor and a brighter lens
- 4K at 60 fps, sometimes slow motion
- Forward and downward obstacle sensing
- Longer transmission range
Premium
Around £600 and above
Omnidirectional obstacle sensing, larger sensors again, variable aperture on some models, and the colour depth that makes footage hold up under grading. Bought by people who already know what they need, and who would rather buy once.
- Omnidirectional obstacle sensing
- Log or 10-bit colour for grading
- Sensors of 1 inch and larger
- Longer flight times and better wind handling
Photo spaceThree drones representing the entry, mid and premium bands, photographed together at the same scale.
Indicative UK street-price bands seen in July 2026 for the aircraft alone, not for bundles. Creator Gear does not publish exact prices, because they change faster than we can check them.
Where to go next
This guide is the foundation. These pages apply it to specific purchases.
The full shortlist across seven awards, from the entry models up to professional aircraft.
Six aircraft compared, with manufacturer figures and the trade-offs behind each award.
The index of everything in the drone section as it grows.
Cards, batteries, filters and bags, including the ones that apply to drones.
If what you want is a camera you can mount rather than one that flies.
Our editorial standards, and how we label what we have used and what we have not.
If something here is out of date or wrong, tell us and we will fix it.
Still to be written
These guides are planned and will link back here once published: Best Drones for Photography, Best Travel Drones, Best Budget Drones, Drone Regulations UK, How to Fly a Drone, Drone Accessories Guide, Best Drone Batteries, Best Drone SD Cards, Drone Maintenance. We list them rather than linking to pages that do not exist yet.
Questions buyers actually ask
Eighteen of them, answered without the sales pitch. Where an answer depends on regulation, the CAA is the authority and we link to it rather than paraphrasing.
Do I need a licence to fly a drone in the UK?
Not a licence in the conventional sense, but you do need to register. Since 1 January 2026 anyone flying a drone of 100 g or more needs a Flyer ID, obtained by passing the CAA’s free online theory test. Any drone with a camera at 100 g or more also needs an Operator ID, which is registered to the person responsible, renewed annually and labelled on the aircraft. Heavier aircraft flying in A2 additionally need a Certificate of Competency.
What is the difference between a Flyer ID and an Operator ID?
The Flyer ID belongs to the person doing the flying and shows they have passed the theory test. The Operator ID belongs to the person or organisation responsible for the aircraft, and it is the number that goes on a label stuck to the drone. One household can have several Flyer IDs and a single Operator ID if one person owns the drones.
How much should I spend on my first drone?
Less than you think on the aircraft and more than you think on everything else. A capable sub-250 g camera drone with satellite positioning, return to home and a three-axis gimbal sits in the entry band, and the money saved is better spent on two spare batteries, a decent card and a set of filters. If you already know you are serious, the mid range is where the meaningful jumps in sensor size and obstacle sensing happen.
Are DJI drones worth the premium?
For a beginner, usually, and the reason has less to do with the aircraft than with everything around it. The app is the most polished, the automated modes are the most dependable, spares are stocked everywhere and resale value holds up. Competitors now match DJI on core hardware for less money, so the honest answer is that you are paying for software and support rather than for the airframe.
How far can a drone actually fly?
Far less than the specification suggests, because the limit is legal rather than technical. UK rules require you to keep the aircraft where you can see it with your own eyes, and a small drone becomes hard to see well before one kilometre. A quoted range of eight or ten kilometres describes the strength of the radio link, not a flight you are permitted to make.
Can I fly a drone in the rain?
Consumer drones are not weather sealed and most manufacturers do not publish an ingress rating for them, which tells you what they expect. Water reaching the motors or the battery contacts causes failures that are not covered by warranty. Fog and heavy mist are equally unwise, because moisture condenses on the lens and on the downward sensors. Wait for a dry hour.
Can I fly a drone over a beach?
Sometimes, and the airspace is usually the easy part. Many beaches sit under local authority or Crown Estate byelaws that restrict taking off and landing, and some have seasonal bans during the summer. Check the local council’s rules alongside the airspace, keep 50 m from people, and be aware that salt air and fine sand are both hard on a drone.
Can I fly a drone in a public park?
It depends on the park rather than on aviation law. Airspace and land are separate questions, and a great many parks have byelaws prohibiting launching or landing without permission even where the airspace is completely clear. Check the managing authority’s website before you go, and expect a polite conversation with a warden if you have not.
What is the best first drone?
For most people, a sub-250 g camera drone with satellite positioning, return to home and a three-axis mechanical gimbal. Those three features matter more to a learner than any camera specification, and they are the ones very cheap drones leave out. Our beginner guide compares six aircraft that meet that bar at different budgets.
Do I need drone insurance?
The CAA states that third party insurance is required if you fly for any commercial reason, including being paid for photographs, and that it is optional for recreation, sport or hobby flying. You remain liable for any injury or damage either way, so optional is not the same as unnecessary. Some household policies extend to it and many do not, so read yours rather than assuming.
Can I fly at night?
Yes, within the same rules that apply during the day, and the aircraft must be lit so you can determine its orientation. The practical difficulties are larger than the legal ones: keeping the drone in sight is much harder, sensors work poorly or not at all in the dark, and small sensors produce noisy footage at night. It is not a beginner activity.
How high can I legally fly?
The limit is 120 m, or 400 feet, measured from the surface below the aircraft. That last detail catches people out: flying along a hillside, the ground falls away and your height above it changes even though your altitude reading does not. Staying below the limit is what keeps you clear of other aircraft.
Is obstacle avoidance necessary?
No, but it is pleasant to have. Obstacle sensing stops an aircraft flying into things it can see, and at the top of the market that covers every direction. It does not reliably detect thin branches, cables, netting or glass, and it does nothing about the most common beginner accident, which is losing orientation and flying somewhere you did not intend. Buy it if the budget reaches comfortably. Do not stretch for it.
Can I take a drone abroad?
Usually, with preparation. Lithium batteries must travel in hand luggage rather than the hold, and airlines limit how many you may carry and at what state of charge. The rules at your destination are a separate matter entirely: registration requirements, permitted areas and outright bans vary by country, and a UK Operator ID means nothing outside the UK. Check the destination’s aviation authority before you travel.
Is a sub-250 g drone still worth buying after the 2026 rule change?
Yes, though for a different reason than before. The lightest class no longer exempts you from registration, so the old argument has gone. What remains is that weight still governs how close you may fly to uninvolved people, and in a country as densely built as the UK that is the practical difference between being able to fly somewhere and not. It is also the class you actually carry with you.
How many batteries do I need?
Three in total is the number that changes the experience. One battery gives you a demonstration rather than a session, and two leave you rationing. Three lets you fly, review what you shot, adjust and fly again, which is how flying improves. Bundles that include two spares almost always cost less than buying them separately later.
Does a drone camera replace a proper camera?
No, and it is not meant to. Drone sensors are small, the lens is fixed, and the aircraft is moving. What a drone gives you is a viewpoint that no other camera can reach, which is a different thing from image quality. Creators who own both use the drone for establishing shots and the camera for everything that needs depth of field or low-light performance.
Should I start with FPV?
Only if the flying itself is what appeals, rather than the footage. FPV is a hobby in its own right with a real learning curve, a much higher crash rate and a different control discipline. If you are drawn to it, spend time in a simulator first and start with something inexpensive to repair. If what you actually want is good aerial video, a conventional camera drone will get you there far faster.
Now narrow it down
You know what the specifications mean and what the rules allow. The next step is a shortlist of aircraft that meet the bar.
Creator Gear is reader-funded and independent. This is a Researched guide. We have not flown these drones, we do not accept payment for placement, and every figure on this page is attributed to the manufacturer or to the CAA.